Introduction
At a Glance
When your K6000 servo drives display fault codes, they’re not always the source of the problem. Knowing your drives can save you time, money, and a service call:
- Power-up State Faults: The drive runs a series of startup checks listed 0-4 on the display. If it stalls anywhere other than 4, it’s indicative and the number will point you to where the problem is.
-
Fault Codes: Treat them as a cause location, not a verdict. Here are the most common codes:
- E19: Position Error, usually a mechanical issue
- E20: Motor Feedback, usually a wiring issue
- E36: Drive Overtemp, usually an upstream issue
Status Lights: Drive status, communication status, and bus status each report a different signal. Steady or flashing, red or green – know what they are signaling.
Confirm the cause before you swap a drive. A code isn’t necessarily telling you a drive is bad; it’s simply telling you where to look. And when the cause can’t be found, make a service call.
Fault codes are an inevitable side-effect of living in a technological age. In this article, we focus on common Kinetix 6000 (K6000) faults.
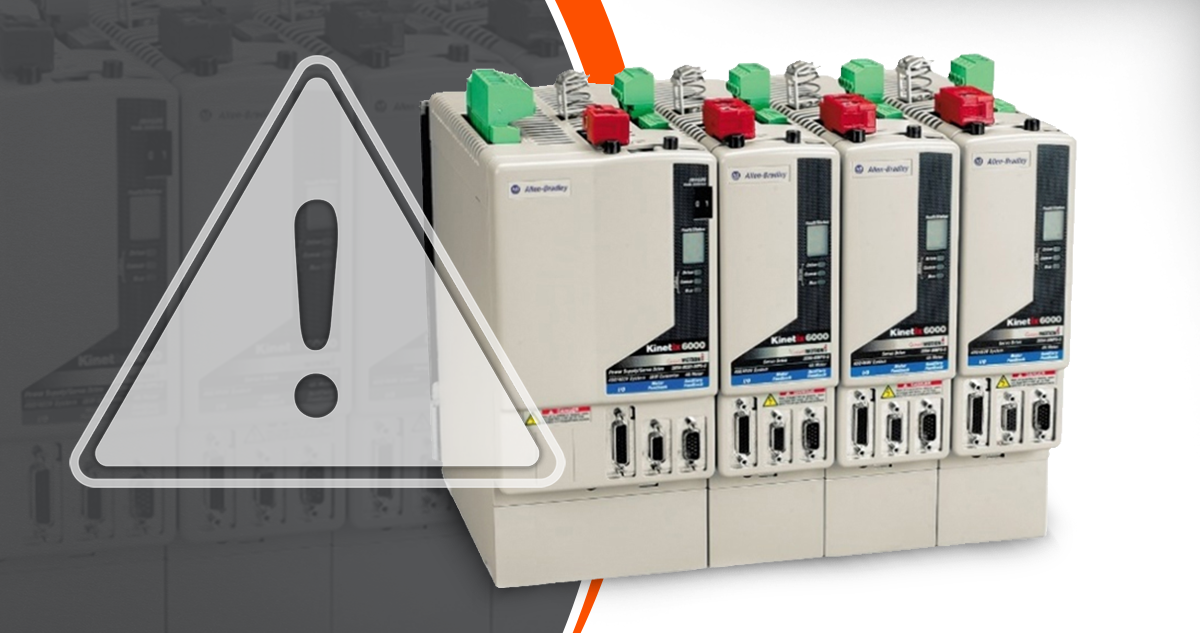
K6000 servo drives were Allen-Bradley’s flagship for roughly twenty years, until going obsolete in 2023 (for more on obsolescence, read our recent article: “How Do I Navigate K6000 Obsolescence?”). Allen-Bradley no longer produces these drives – with most OEMs switching to the K5700 – but they are still widely used on existing machines.
When a K6000 experiences a fault, it’s easy to be overwhelmed, and call your OEM. However, over the years of responding to these calls, Douglas has noted the three most common faults. And they’re actually easier to remedy than they might seem.
In this article, we’ll cover:
- How to read power-up state hang-ups
- What different signals communicate on status lights
-
Common faults (E19, E20, E36), what usually causes them, and how to fix them:
- How to use a swap test to evaluate whether you need a part replacement
- When to stop resetting and call for service
K6000 Functionality and Troubleshooting
K6000 servo drives are part of a larger framework on your machine called the Serial Real-Time Communication System (SERCOS). It’s a daisy-chain of drives that run back to the programmable logic controller (PLC), passing motion data as pulses of light.
We’ll start to work through common faults, how to identify them, and how to fix them. But servo drive fault codes do not always point to a problem with the drive itself. Sometimes they are a signal that your problems lie elsewhere.
Faults at the Power-Up State
When a K6000 rack is powered up, it takes a moment for each of the drives to come ready. They each run through a check sequence and show their progress as a single digit on the display – a number 0-4. Where a drive stops progressing is the first and most valuable fault clue you get.
The number displayed is signaling a check that the drive has passed. So, if the drive sticks at a digit, it’s a good indicator of what is failing:
0 → The drive is still looking for a complete fiber-optic ring (the SERCOS network that we mentioned earlier). A fiber connection is broken or loose somewhere on the ring.
1 → The ring is closed, but the node addresses don’t line up to what the PLC expects. Node addresses are how the SERCOS references specific drives in the ring.
2 & 3 → The drive is checking its programmed configuration and finding a mismatch.
4 → All checks are passed and the drive is ready.
Pro Tip
The K6000 IAM is the controlling drive in the rack — it distributes power, sets node addresses, and starts the safe-off circuit. When you replace it, forgetting to set the node address is a common mistake. If it goes unnoticed, other rack and power issues may arise.
Faults in the Power Indicator and Status Lights
The drive face gives you a small power indicator and three LED status lights. Each light reports something different. Luckily, these lights work as signals, by color and pattern:
- Logic-Power Indicator – The first status light is a small logic-power dot. It confirms that control power is present. If this light doesn’t turn on, it means the drive isn’t getting the power it needs.
- Drive Status Light – This is the first of the LED status lights. If it’s off, it means the drive is good. If it’s red, it means it’s faulted.
- Communication Status Light – This is the second of the LED status lights. This light will flash while the SERCOS ring is powering up and go steady green when it’s ready. If this light is off, that means there’s no SERCOS ring detected at all.
- Bus Status Light – This is the third of the LED status lights. If it’s steady green, the drive is enabled for SERCOS. If it’s flashing green, that means the drive has been disabled by command. If the light indicates disabled by command, then the problem lies in the program logic, not the drive hardware.
Drive Faults and Codes
Now that we’ve worked through faults in the power-up state and with the status lights, we can cover common fault codes in the drives themselves. While the K6000 can throw dozens of fault codes, these three account for the most calls. And they share a theme: the code names a symptom, and the cause is usually mechanical, a cable, or setup. It’s not the drive itself.
The drive throws this code when the fault is because the axis couldn’t hold its programmed position, within the tolerance. Before faulting, the drive ramps up toward peak torque, pushing against resistance. Once it maxes out and still can’t hold position, that’s when it faults.
Usual Cause: Mechanical
- A ring fitting that’s worn or torqued incorrectly, slipping where the gearbox meets the motor
- Something physically hitting the same spot every cycle
To Fix: Confirm the axis is mechanically free, by moving or jogging it by hand (this should be doable if the machine was properly set up)
Note: If the drive faults in the same exact spot every time, something is hitting. A bad drive would not fault in the same position every cycle. A paint-pen mark across the fitting will show you if it’s slipping.
The drive typically throws this code because of a feedback cable or connector, not the drive itself.
Usual Cause: Wiring
- A conductor breaks off inside a connector that was over-torqued; it looks properly wired, but doesn’t receive connection
- Feedback cables run too close to high voltage, and electrical noise is picked up
- An extra service loop coiled inside the breakout enclosure may add noise, rather than convenience
To Fix: Rewire without any slack wire
Note: The current generation of Allen-Bradley drives, called the K5700, have largely designed this problem out. They feature better-insulated, consolidated feedback cabling. These are the drives that Douglas now uses when building machines.
The drive throws this code due to excessive heat.
Usual Cause: Upstream Mechanical Problems
- A worn or binding part forces the drive to run at higher torque to keep up, which causes extra heat in the drive
- Often near the heat tunnel or at the discharge near the end of the line (ambient heat is already higher here)
- A homing or tuning problem – e.g. an axis holding itself against a hard stop, trying to maintain a position it can’t quite reach
To Fix: Replace or service a worn part, belt, bearing, setup value, etc.
There’s a fourth fault that doesn’t fit the same code pattern but accounts for a surprising number of calls. This has to do with the red safe-off connectors which are daisy-chained across the top of the drives. They can work themselves loose, and the machine will throw a safety-circuit-not-ready fault and not reset.
Usual Cause: Physical Movement (e.g. someone has bumped them while in the cabinet)
To Fix: Reseat them – go down the row and push each connector in; usually, you’ll feel a click and the machine will reset
This is worth checking early. The fault reads like a safety-system problem, when it’s only a loose connector.
Note: The safe-off circuit came on the later drive series. The earliest K6000 drives don’t have it – this will matter when you’re mixing drive series in one rack.
The Swap Test
Douglas machines reuse the same drives and motors across racks. If this is true of your machine, you will usually have a like part on the machine that is known to be in good condition. You can swap this like part into the drive (it will be two cables, as long as the node addressing is correct) and evaluate what the fault does. This same logic can also be used with faulty motors.
If the fault follows the drive to its new location, you know the drive is the problem. If it stays in the original position, the cause is the motor, cable, or something mechanical.
One note of caution: the drive doesn’t check whether the entered parameter value is sane. If you type a bad value (e.g. continuous torque above 100%), the drive will accept it and then hang at power-up state without telling you why.
If a drive started misbehaving right after someone changed parameters, compare the current values against a reference that is known to be good. You can then change them back before you suspect the hardware.
Note: Newer Douglas programs reload the drive’s parameters from a saved set on each recipe change. So, hand-entered changes won’t quietly persist.
When to Stop and Call
Sometimes faults are worth making a service call, rather than making a reset. Knowing where this line is will save you both a spare and a recovery window.
Stop and call for service when:
- The same fault returns immediately, every time you reset
- A replacement drive won’t communicate with the rack after you’ve installed it
- You are going to swap an expensive drive based on a guess
If you try to fix the drive at floor-level when a service call is merited, you’ll end up wasting time or causing expensive, and unnecessary, fixes.
The Stakes: Losing a Spare and Long Recovery
A misread fault has a twofold cost:
- It stretches a recovery that should have only taken minutes
- It can get a perfectly good drive condemned and pulled, while the actual cause stays and continues damaging the machine
Reading the code as a location rather than a verdict is what keeps both liabilities from happening.
Before You Reset Again
When troubleshooting a K6000 is done right, it’s calm and quick. You read the power-up state and know roughly where to look. You read the status lights and narrow it further. You match the code to its usual cause, confirm it, and fix it, then you’ve saved yourself a good deal of time and money.
The question to ask yourself before resetting again is simple:
- Did the state, the lights, and the code point to a cause or just a location?
If you can identify the cause, clear it. If a swap test confirmed the bad part, replace it. If you’ve read the drive and still can’t name the cause, make a service call.
Not Sure How to Proceed with Your K6000?
Schedule a discovery call. Douglas specialists can answer questions and help guide you to the best course of action.